
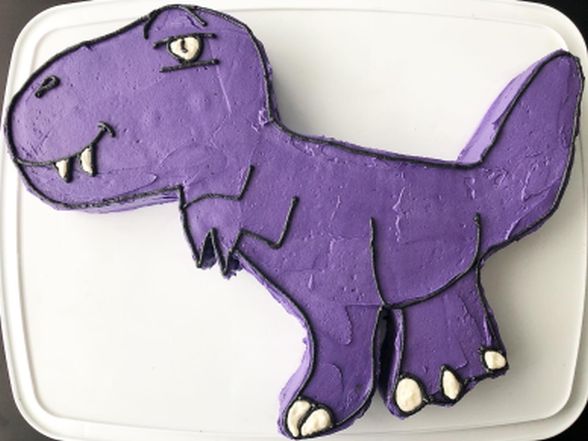
My toughest customer, Francis Levi, turns 4 today, and this year he asked for a “scary but cute purple T-Rex cake with rainbow surprises inside”. Copy that!
As always, Nicole and I first did some Google image searches to see what we could find for inspiration. 99.9% of the cakes that show up are insane 3D creations involving fondant, which isn’t really achievable for the home-baker, so we went with something a little more lo-fi. Here’s how I did it:
- Step 1: Make a Template. To do this, I got out my 9×13″ rectangle pan and traced it on a piece of craft paper. I cut that out, and then using a picture I found on Google for inspo, drew the outline of the T-Rex. To make him a bit bigger, I ended up just having his head and body in the 9×13″ rectangle, and then used the negative space to draw the legs and tail. I then cut out all the parts and taped them together for my final template (making sure it would fit in my cake carrier).
- Step 2: Bake the Cake. The birthday boy requested a chocolate cake, so I used the Party Cake Builder in Smitten Kitchen Everyday, which ended up being 2x the recipe for the Fudgey Chocolate Cake.
- Step 3: Carve the Cake. Once the cake was baked, cooled, and chilled, I removed it from the pan, put it directly on the cake carrier (you can also use a cake board) and placed my template on top. I used a sharp knife to carve out the head/body of the T-Rex, and then using the scraps, carved out the legs and tail. Optional: I also carved out a three secret chambers, filled them with sprinkles, and placed a circle of cake back on top. This way Francis would get his rainbow surprises when the cake was cut near those areas, and sprinkles would come pouring out!
- Step 4: Make the Icing. I mixed up one batch of My Favourite Buttercream and set aside about 1/4 cup to tint later. I dyed the rest a very vibrant purple using my AmeriColor gel food colouring. Note that gel food colouring is a must for getting such deep, bright colours. You just can’t achive this with liquid food colouring.
- Step 5: Crumb Coat & Chill. Using an offset spatula, I added a thin coat of purple icing to the entire T-Rex. Because this is a carved cake, it will be super messy, with crumbs everywhere. This is okay! That’s why you chill the cake for 30 minutes once the crumb coat is applied. This locks in the crumbs and you won’t see them once the cake is finished.
- Step 6: Final Layer of Icing. Remove the cake from the fridge and use the same offset spatula to apply a final, thicker layer of smooth icing.
- Step 7: Pipe on the Detail. Take the 1/4 cup of icing you set aside earlier and add about 1 tbsp to a small bowl (leave this white). Dye the rest of the icing black with gel food colouring. Add very small round icing tips to two separate piping bags, and fill one with white icing and the other with black icing. First pipe on the black outline and detail, then use the white icing to fill in the eyes and toes. At this point you can chill the cake until ready to serve, or freeze it for up to one month.
Francis’ Previous Birthday Cakes:


Leave a Comment