

Every December I convince myself I’ll have time to make decorated sugar cookies for various Christmas parties or cookie platters, and of course I never do. They’re so pretty, but so time-consuming, so instead I make them for Valentine’s Day (you can see them on my Instagram going back over the years in so many different designs: marbled, ombré-d, “We Go Together Like”).
Well, in the recurring theme of 2020, of course I had time to make them this year. This also means I can FINALLY document my favourite sugar cookie recipe, plus a few of my little tips and tricks for decorating.
First of all, the cookies. I’ve been using this recipe from Annie since I first made these cookies way back in 2010. It’s buried pretty deep on her blog (and mine) and I’ve had trouble finding it a few times, so I’m happy to post it here. I’ve tried a few other sugar cookie recipes over the years, but this is the one I always come back to. It makes a manageable amount of dough, rolls and re-rolls easily and is delicious. I like my sugar cookies pretty thick (about 1/4″) so you get a slightly crisp edge but a soft, tender middle. I DO NOT like a thin, crunchy sugar cookie. Get outta here with that.

Decorating sugar cookies is one of my favourite baking projects, but I’ve learned a few things over the years to make it more enjoyable:
- Bake the cookies in advance and store them in the freezer until you’re ready to decorate. Trying to make the cookies AND decorate in one day is just too much (for me anyway)
- Only make one batch. I know my attention span/patience level is exactly enough for one batch of this dough and however many shapes it makes. By the time I’m done decorating, I’m always over it!
- Plan in advance which shapes you want to make and what colours you’ll need. I usually limit myself to one or two shapes and just a couple colours to keep things simple
- Check to make sure you have all the decorating supplies you need in advance (i.e. piping bags, squeeze bottles, toothpicks, gel food colouring, sprinkles) so you don’t realize after you get started that you’re missing something
- Make sure you have lots of time for decorating! I never try to do this in a rush. I put on a podcast (or this year it was a Christmas movie) and relax into the process
- Finally, and most importantly in this dumb social media era we’re living in, don’t compare your cookies to anything you see on Instagram. Those people are professionals who decorate cookies all damn day, every day, so don’t worry if yours don’t look like theirs (I say this as a good reminder for myself too!)
When it comes to actual instructions and techniques for decorating, I’ll just direct you to another Annie post that I still refer to, plus a marbling tutorial from ChelSweets that I tried a few years ago.
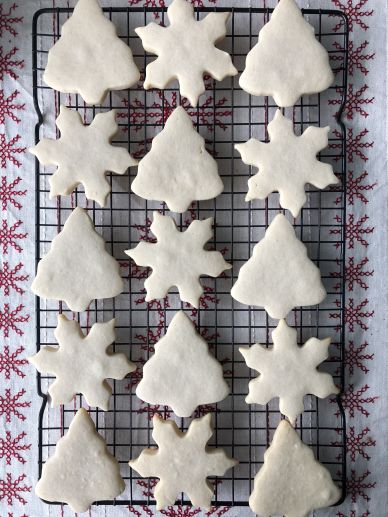
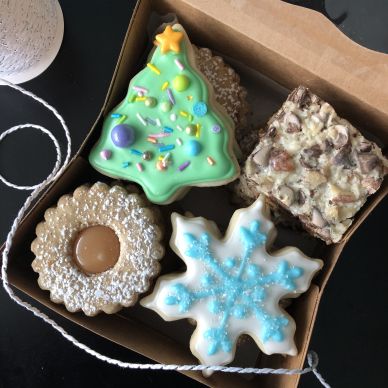
This year, I made little Christmas trees and snowflakes and thought they turned out so cute! I boxed them up with a few of my other faves and delivered them around town to friends and family. I’ll probably still make more on Valentine’s Day though!
My Favourite Sugar Cookies
Source: Everyday Annie
Ingredients
- 1 cup (2 sticks) butter, room temperature
- 1 cup icing sugar
- 1 egg, room temperature
- 1 1/2 tsp almond extract
- 1 tsp vanilla
- 2 1/2 cups flour
- 1 tsp salt
Directions
- In a large bowl, beat the butter with an electric mixer for about 30 seconds. Add the icing sugar and mix on low (so it doesn’t fly all over your kitchen!) until combined, then mix on medium for 30 seconds. Scrape down the sides of the bowl.
- Add the egg, almond extract and vanilla and mix again until combined (it might look a little soupy, but it’ll be okay). Scrape down the sides of the bowl again.
- Add the flour and salt and mix until combined.
- Gather the dough into a ball and place on top of a large sheet of plastic wrap. Shape it into a disc and wrap tightly in the plastic wrap. Chill for a couple of hours, or until firm.
- When you’re ready to roll and bake, preheat the oven to 375° and line cookie sheets with parchment paper. Take the dough out of the fridge so it can soften just a little bit before you roll.
- Place the dough on a well floured surface and flour your rolling pin. Roll out the dough to about 1/4″ thickness (I like them quite thick). Place the cookies on the cookie sheets and bake for 8-10 minutes – you don’t want them to brown. Cool completely before decorating.


Leave a Comment