
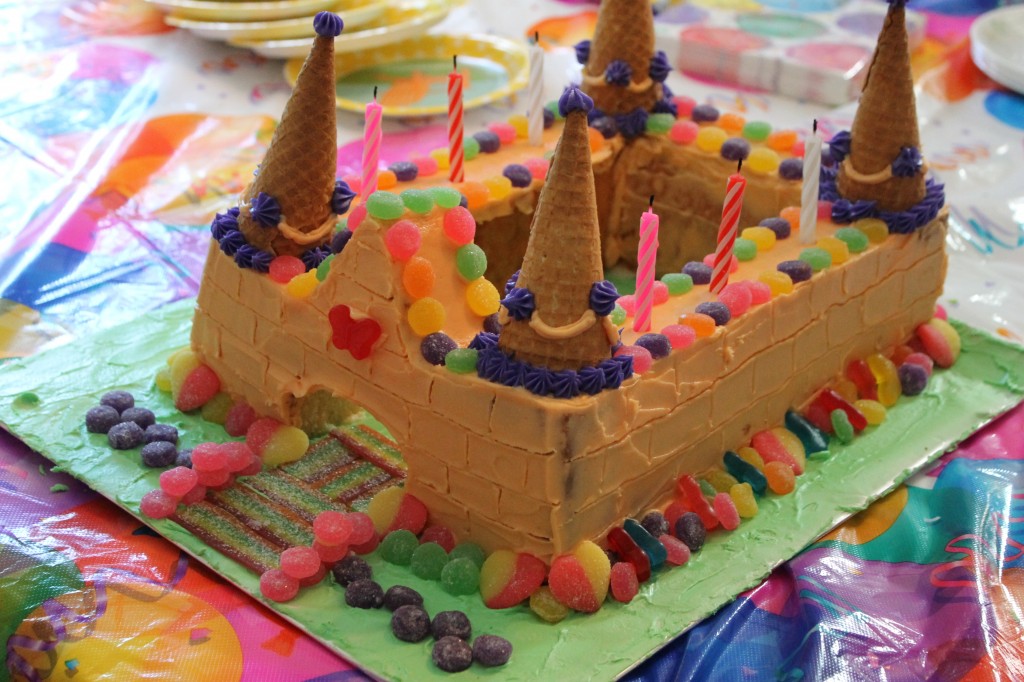
Last Spring, shortly after her brother’s Front-End Loader Birthday Cake, I asked my niece what kind of cake she wanted for her birthday, and got a request for a Princess Cake. My first vision was of one of those creepy cakes with the Barbie stuck in the middle (just do a google image search for Barbie cake, and you’ll see what I mean), so I thought I would go in a different direction. I somehow came across this castle cake on Pinterest and didn’t look back. Here’s what you need to do, if you have a little princess in your life:
- Mix up your favourite cake (I made my favourite vanilla cake) and bake the whole thing in a 9×13″ pan. I can’t remember how long it took to bake, but the toothpick test will never lead you astray.
- Mix up 1 batch of buttercream icing, tint a little bit purple, and the rest a kind of peachy colour with a bit of red and a bit of yellow.
- Slice the cooled cake into four equal size strips, the short way, not the long way, if you know what I mean. It looks deceiving in the photo, because it looks like there are two long strips and two short strips, but trust me, they’re all the same length, it’s just the way you put them together.
- Use a knife to carve out a little archway in one of the strips. Take the cutout and carve it into a triangle. Use the icing to stick the triangle above the archway.
- Stand the strips up on their side and fit them together into a rectangle, as shown above. I used a bit of the icing to sort of glue the pieces together. Put a little bit of icing on the bottom too. (Note: My Dad was my helper for this project, and he thought the cookie sheet should be covered in green icing, for which he used canned frosting. Just a note that canned frosting does not firm up in the fridge, and just sort of stays greasy and melty and is not an ideal “glue” to hold things together. It also tastes gross, just saying).
- Crumb coat the whole cake in a thin layer of icing, then chill for 30 minutes.
- Get the candy ready: I went to Bulk Barn and got a whole bunch of Tropical Jelly Dots, and then some hearts and butterflies.
- Get the turrets ready: I decorated mine with a small star tip.
- Put the final coat of icing on the cake, and then use a tooth pick to make the brick outlines. Stick the ice cream cones on top in each of the corners.
- Go nuts and decorate however you like!
This was a big hit, and there were lots of little hands reaching for the candy around the edges. Happy Birthday Charlotte!
Charlotte’s Previous Birthday Cakes:
5th (Rainbow Cake)
4th (Blue’s Clues)
3rd (Big Greeny-Blue Cake)
2nd (Elmo)


Leave a Comment