
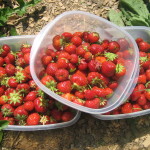
I grew up watching my Mom make countless jars of strawberry jam and mustard pickles, but never really had any interest in canning myself. Over the last few years, I’ve been making skillet jams that I can keep in the fridge, but recently I’ve been a bit jealous of my friends who are total canning superstars. These girls are always giving me jars of their dill pickles and homemade jam, and I’ve become more interested in the process. You can see where this is going.
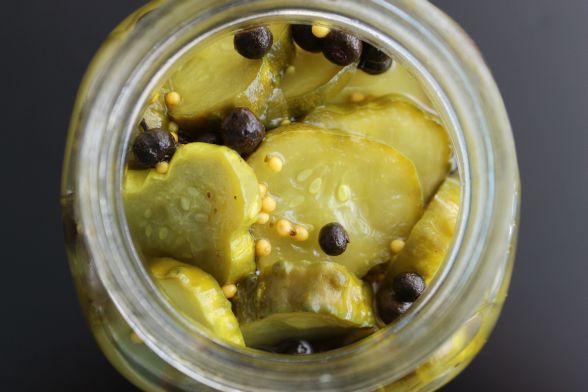
The tipping point arrived when fellow foodie friend Amy from Family Feedbag published her new book, The Canning Kitchen. I picked up a copy when she was in town back in June, and flipping through it gave me all the motivation I needed to finally give canning a try. It wasn’t hard to pick my first recipe: Bread & Butter Pickles. Here’s how I did it:
- Step 1: I decided this would be a Mother/Daughter project, mostly because I was still a little scared that I would end up with exploding jars or something and I wanted back-up for PICKLE DAY.
- Step 2: A few days before PICKLE DAY we went to Bulk Barn to pick up all of our spices and to Canadian Tire to get our canning supplies, including pickling vinegar and pickling salt, which I couldn’t find at my regular grocery store.
- Step 3: The night before PICKLE DAY I cleaned my kitchen and cleared everything off my kitchen counters and set out all my new canning supplies (Amy includes a section on canning equipment in the book, so I knew exactly what I needed). My kitchen is basically the size of a shoebox, so this is key.
- Step 4: The morning of PICKLE DAY I went to the Farmer’s Market near my house and bought my big basket of cucumbers, brought them home, washed them, sliced them, tossed them with sliced onion and pickling salt and set them aside. It’s really important to read the recipe thoroughly before starting, as there’s a 3 hour wait time here before you can proceed (we went out for lunch while we waited!).
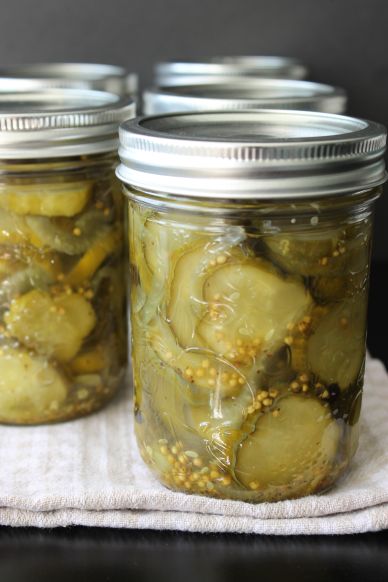
- Step 5: We followed the rest of the recipe, including making the pickling solution, and then processed the jars according to Amy’s 10-step Processing Checklist in the book. We had the book open on the counter and consulted it every step of the way to make sure we didn’t miss anything (especially since my Mom is like, oh you don’t need to do this part, Grammy never did this, and I’m like, but Mooooommmm, Amy says that according to North American home canning guidelines… {insert Mom rolling eyes at me}).
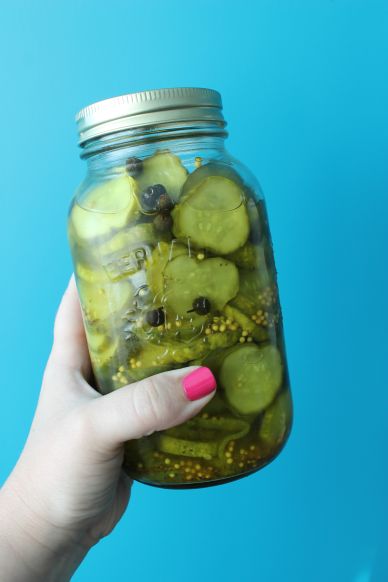
Overall, the process went very smoothly, even in my teeny tiny little kitchen, thanks to Amy’s clear instructions. The only thing that threw me off was that I ended up with a LOT of extra cucumbers – enough to fill a 1L jar. I ended up making some extra pickling solution, and sticking that jar in the fridge.
Turns out the most challenging part of making pickles is that you have to wait 2-3 weeks to eat them! I finally cracked open my first jar the other day, and they are LEGIT. I can’t believe we made these in my kitchen! You can find the recipe on Page 102 of The Canning Kitchen.
Now for a GIVEAWAY! You too can become a canning queen or king by winning a signed copy of The Canning Kitchen, plus a $100 Gift Card for Canadian Tire, where you can stock up on everything you need to can. Just leave a comment telling me what you’d like to can (think jam, pickles, chutney) and then fill out the Rafflecopter below to enter (start by filling in your name and email address). You can gain even more entries by following the gang on various forms of social media, but that part is optional.
This giveaway is open to anyone in Canada and will run until next Wednesday, September 2nd. Good luck!
You can click the links below to see what my friends made from The Canning Kitchen:
- Brittany made Lemon Raspberry Jamalade {My Daily Randomness}
- Charmian made Orange & Blueberry Marmalade {The Messy Baker}
- Chelsey made Peach Jam {Chelsea’s Healthy Kitchen}
- Gwen made Tomato Red Onion Relish {Devour & Conquer}
- Heather made Triple Red Pickle {The Tasty Gardener}
- Jenny made Blueberry Sauce {The Brunette Baker}
- Kristy made Crunchy Dill Pickles {She Eats}
- Libby made Peach Chutney {Libby Roach}
- Meg made Beer-Hive Grainy Mustard {Sweet Twist of Blogging}


Sara
September 3, 2015 8:46 amWould love to try these pickles. They look great!
MaryJane Omand
September 1, 2015 11:26 pmThe bread and butter pickles look delicious. I’m going to try them . I have fond memories of my grandmother making chilli sauce. Instead if cooking the sauce on the stove she used to cook her chilli sauce in roasting pans in the oven. The whole house smelled wonderful.
Krista M
August 31, 2015 1:00 amPickles are pretty awesome, and Pickled Green Beans are second best in my book! They go amazingly well in a caeser drink with salted rim~ pure heaven! Thanks for this cool giveaway!
LJ Stubbs
August 30, 2015 11:27 amOoo. I want to be a canning queen!
Teresa
August 28, 2015 3:12 amI really want to make all sorts of pickles before the harvest season is over.
tatiana
August 27, 2015 7:17 pmgive-aways are great, and so are canned peaches – that’s my wanna-try canning project
(incidentally, also featured in a book i just finished and i was thinking, “it’s a reminder for me to get to it”) 🙂
Katie
August 27, 2015 3:58 pmI would like to try canning my own pickles.
Lushka Smith
August 26, 2015 11:54 pmThat looks like a fantastic book, thanks for the chance
Belinda McNabb
August 26, 2015 6:10 pmI would so love to start attempting to can myself. I have never tried it
Danielle
August 26, 2015 5:12 pmI’m really down for anything pickled….beets, carrots. But I might give these pickles a try next summer!
Shannon B
August 26, 2015 3:45 pmAmy’s cookbook looks great! This inspires me to venture out and try canning pickles!
Trevor Hallworth
August 26, 2015 3:21 pmWould definitely love to get into canning!!
We were at a bar recently were they had pickled mixed veg (Cali, carrots, celery) and it was awesome!
Would also like jam, pickled beets and maybe some pasta sauce. Oh yah and pickles too 😀
Kathleen
August 26, 2015 3:18 pmI love canning pears and peaches.
Your pickles, look amazing !
Mama B
August 26, 2015 11:57 amI’d like to try pickled peaches. They’ve always interested me.