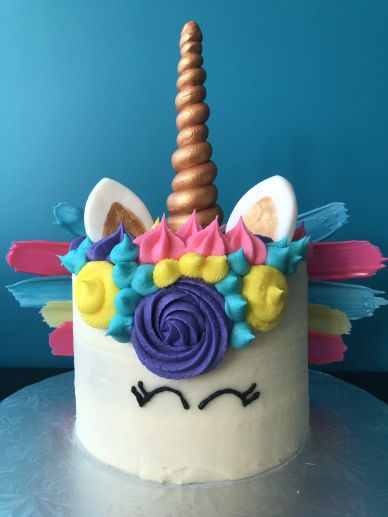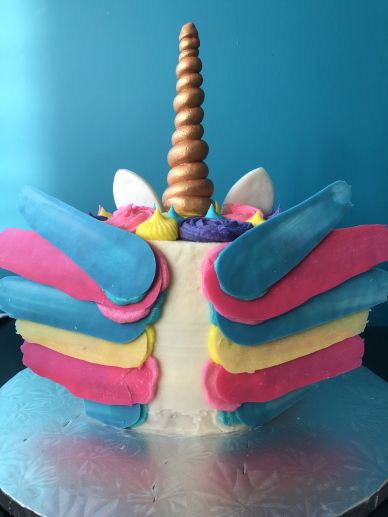
Does this cake look familiar? My niece’s request for her birthday cake this year was awfully similar to last year, with one exception: WINGS. Did you know a Unicorn with wings was called an Alicorn? I sure didn’t, and when I asked “Isn’t that a Pegasus?” I was swiftly corrected: “No Auntie Robyn, a Pegasus doesn’t have a horn!”.
With that clarified, I set out to remake last year’s Unicorn Cake, but to somehow add wings to it. Initial research turned up a couple of options that kind of scared me. First, wings made out of edible wafer paper (like communion hosts!? not the best tasting!) and second, wings made out of meringues, which also seemed like a disaster waiting to happen.
In the end, Danielle saved the day by sending me this post, with brushstrokes made out of melted candy melts, which we figured could look like wings for the Alicorn.
This turned out to be super simple and looked great! Here’s how I did it:
- Made the Unicorn Cake exactly as described in last year’s post
- Picked up about 1/2 cup of candy melts from Bulk Barn in pink, yellow and blue (why don’t you have purple candy melts Bulk Barn?!!)
- Bought some new craft paintbrushes from Staples on my way to work one morning
- Spread a large piece of parchment paper on my counter and taped it down
- Working one colour at a time, melted the candy melts in the microwave, then used a spoon to add little blobs on the parchment paper
- Used a paintbrush to swipe the candy melts across the parchment paper (check out the tutorial for a visual – I didn’t take pictures)
- Once the wing pieces had hardened on the parchment paper (you don’t even need to chill them, they’ll just harden at room temperature), gently remove them
- Used leftover buttercream to add the wings to the cake. If I made this cake again, I would try to make the wings bigger. This time I was afraid they would start to droop or fall off, so I just kept them small

My brother said the cake was a hit at Rebecca’s birthday party, everyone wanted to eat the wings! Success!
Rebecca’s previous birthday cakes:


Leave a Comment